Perdigon nymphs have become one of my favourite flies to tie over the last year. originated from Spain, these mini bullet look flies have fast become nymphs that have found a home in many anglers fly boxes. The thing I love the most about them is that the list is endless for the different colour variations you can tie them in. You can use all manner of materials like Trans Brite, tinsels and my favourite, polish quills!
Invented by Spanish competition Anglers these flies are designed to be fished in fast flowing rivers and sink very quickly. When fishing with perdigons I set up with a 10ft 4wt rod, a French leader and either 2 perdigons or a Perdigon on the point and a lighter nymph such as a simple hares ear just above, I’ve found this to be the most productive in recent outings.
Below I have put together a simple step by step on how I tie a Perdigon nymph.
Hook – Partridge Wide Gape Jig size 16
Thread – Textreme Lemon 8/0
Tail – coq de Leon
Bead – slotted nickel 3.0
Body – Oliver Trans-Brite
Collar – Textreme Fluo hot orange
UV resin – Deer creek fine
Step 1
Place the hook in the vice and secure the bead in place with thread wraps.
Step 2
Take your thread down to the bend of the hook with touching turns.

Step 3
Take some coq de Leon and catch on top of the hook shank, you want your tail to be approximately as long as the body.

Step 4
Run your thread back towards the bead and catch in one strand of trans Brite.
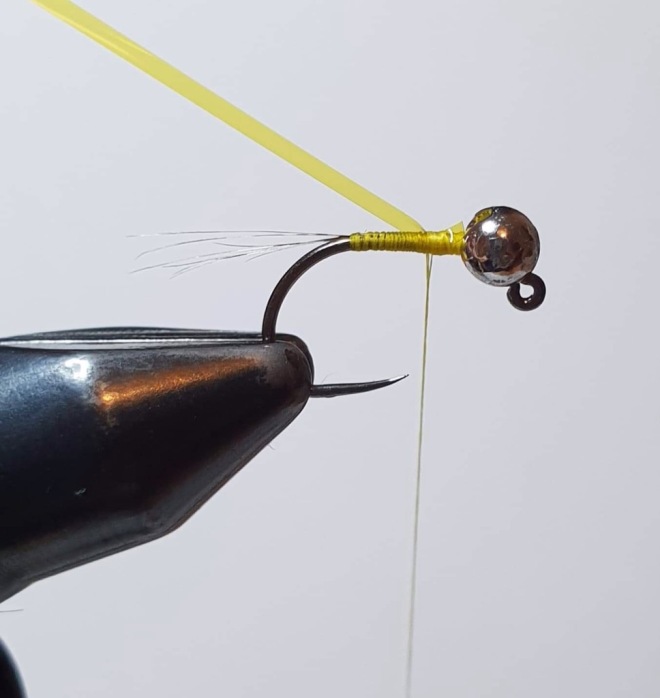
Step 5
Wind your trans Brite down to the tail, then create a nice tapered body by going back and forth. Trans Brite is quite a stretchy material, with it being transparent the more you wind it over it’s self the darker it gets so you can taper your body to get the look of the invertebrates that you find in the river!
Secure in place and whip finish.

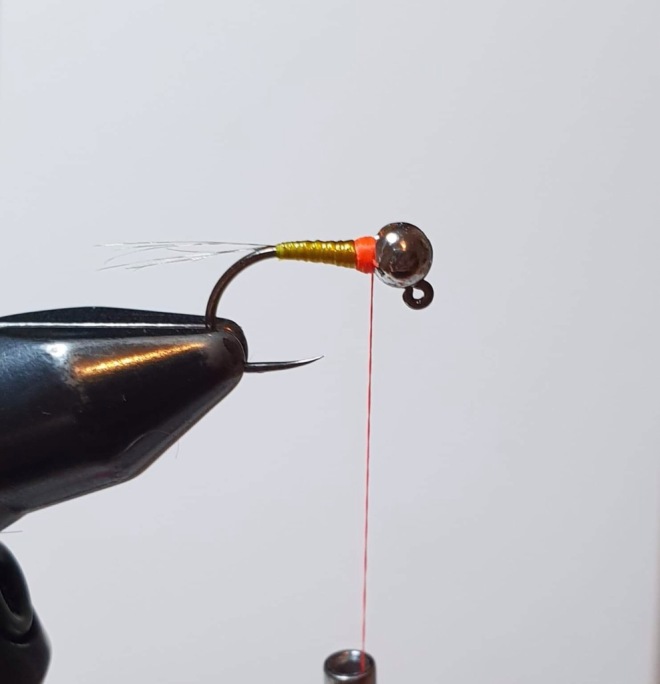
Step 6
I like to add an orange collar, not massive just a little one. Just enough to cover where you have whip finished.
Step 7
Make another whip finish and then apply uv resin, a nice tapered coat is what your looking for.

A quick zap with a uv torch and you’re good to go. When I tie with resin I like to leave the flies on a windowsill during the day to make sure they go rock hard then into the fly box they go!
About the author: Phillippa Hake
I started fly fishing and fly tying about 4 years ago. After a days fishing at Raygill Lakes me and my dad took a trip to a local fly tying shop where he bought me a Veniards Fly Tying starter kit. it came in a little white box which soon took over the spare room!!
I’m part of the Partridge Hooks Talent Pathway Pro-team and Deer Creek Pro-Team which has given me over the last couple of years the opportunity to visit shows across the UK and tie next to some great fly dressers. I have recently become an ambassador for the new app for fishing and hunting called Wild Society.
alongside fly tying I love nothing more than visiting my local river and having a couple of hours fishing to tempt the wild trout and grayling with my flies.
I’ve met so many people whilst I have been fly fishing and fly tying, and I hope one day we cross paths out on the bank! enjoy the blog and tight lines :]
https://phillippahakeflyfishing.wordpress.com/